
 I am terribly sorry for being late in participating in Sophistique Noir's Monthly Theme!
I had forgotten that this month's theme was purple. Well, when I first read it, I was going to showcase my lovely plum and black flocked bedding (as opposed to my black-on-black flocked bedding, or my charcoal and black 'damask' patterned bedding, or my piles of black cushions... I am one of those Goths whose preferred aesthetics are applied to most of what they own.) but then I forgot about it entirely and did not get around to photographing the bedroom.
Oops.
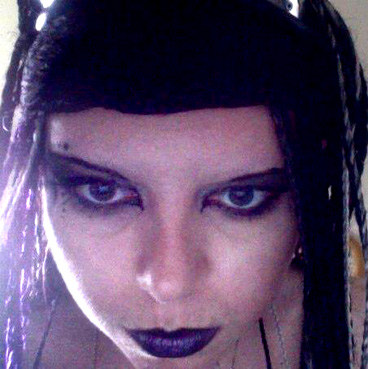
So, something else purple! Here is some Cyber-Goth style makeup I did last summer. I'm wearing my micro-braid wig, which has a few purple braids down one side, and my goggles have purple lenses (made from an old translucent document wallet that I cut up!).

As you can see, terrible selfies taken on my onboard webcam, again. This is what happens when I want pictures of me and Raven is out working! All selfies taken either in the mirror or with funny out-stretched arm movements look even worse, and as Raven is quite possessive of his photographic equipment, and I'm too polite to touch his tripod without asking, I haven't got around to just mounting a camera on a tripod, sticking a cushion where my head will be to focus on, and then running back around to where the cushion was with the camera set to take a picture via the timer.
Anyway, the micro-braid wig is self made, and the makeup was done to match. The lipstick is a metallic purple that is almost iridescent made by Stargazer. The eyeshadow is actually black and silver, but with a touch of purple under my eyes. I don't have purple eye-liner, sadly, it just looks that way in the photograph.

I like drawing elongated corner on my inner eyes, but rarely do I get them as neatly done as here. I almost always get them wrong, however much I practise. I did decorative shapes around one eye in eye-liner, and as per usual I didn't do both. This is because a) it's really hard to get the symmetry exact, and b) I think that it becomes too much and looks cluttered if I do both sides.

I am actually wearing a 'spaghetti straps' tank top! With my braids obscuring the straps, it looks like I'm not wearing a top, but I am. You can just about see a purple goggle-lense in this last picture, and it shows the dots and lines and suchlike around my right eyes. I'm so used to doing foliate designs and swirls; the angular design and dots were a bit different. I also like how this picture shows how the silver eye-shadow goes right up to my nose, but the eyeliner from the inner corner is brought upwards with a bit of black eye-shadow to the crease, to give a more distinct eyelid, and to make my nose look narrower.
I think this post also shows a little of how varied my style can be. One day I can be all black curls and lace and frills, and another day I am all spikes and goggles and purple lipstick! I wear things because I think they look nice, and I refuse to get pigeonholed into one specific style.

As you can see, terrible selfies taken on my onboard webcam, again. This is what happens when I want pictures of me and Raven is out working! All selfies taken either in the mirror or with funny out-stretched arm movements look even worse, and as Raven is quite possessive of his photographic equipment, and I'm too polite to touch his tripod without asking, I haven't got around to just mounting a camera on a tripod, sticking a cushion where my head will be to focus on, and then running back around to where the cushion was with the camera set to take a picture via the timer.
Anyway, the micro-braid wig is self made, and the makeup was done to match. The lipstick is a metallic purple that is almost iridescent made by Stargazer. The eyeshadow is actually black and silver, but with a touch of purple under my eyes. I don't have purple eye-liner, sadly, it just looks that way in the photograph.

I think this post also shows a little of how varied my style can be. One day I can be all black curls and lace and frills, and another day I am all spikes and goggles and purple lipstick! I wear things because I think they look nice, and I refuse to get pigeonholed into one specific style.


